Cheesy Baked Asparagus: The Ultimate Comforting Side Dish
When it comes to vegetable side dishes, few things are as elegant and universally appealing as asparagus. Its vibrant green color and distinct, slightly earthy flavor make it a favorite for spring dinners, holiday feasts, and simple weeknight meals alike. However, if you are looking to elevate this classic vegetable from a simple side to the star of the plate, look no further than Cheesy Baked Asparagus.
This preparation method takes the natural crisp-tender goodness of roasted asparagus and blankets it in a rich, bubbling layer of savory cheeses. It’s a dish that manages to be simultaneously wholesome and incredibly decadent, making it perfect for coaxing picky eaters into enjoying their greens, while also impressing guests at your next dinner party. In this comprehensive guide, we will explore everything you need to know to make the ultimate cheesy baked asparagus, from selecting the perfect spears to achieving that flawless, golden-brown cheese crust.
Selecting and Preparing Asparagus
The foundation of great cheesy baked asparagus is, of course, the asparagus itself. Taking the time to select the right produce and prepare it properly will ensure the best possible texture and flavor.
Choosing the Best Spears
When shopping for asparagus, whether at the farmers’ market or the grocery store, keep these tips in mind:
- Thickness: Asparagus comes in varying thicknesses, from pencil-thin to quite thick and robust. For baking, medium-to-thick spears are generally preferred. They can hold up well to the heat of the oven and the weight of the cheese without turning to mush. Very thin spears (often called “pencil asparagus”) tend to overcook too quickly in a cheesy bake.
- Color and Texture: Look for spears that are a vibrant, bright green (or purple, if you’re using purple asparagus). The stalks should feel firm and crisp to the touch, not rubbery or limp.
- The Tips: Pay close attention to the tips of the asparagus. They should be tightly closed and compact. If the tips are starting to open up, spread apart, or look mushy, the asparagus is past its prime.
- The Stems: Check the cut ends of the stems. If they look excessively dried out, woody, or split, the asparagus is likely old and will have a tough texture.
Preparing the Asparagus
Once you have your fresh asparagus, it needs a little prep work before it hits the baking sheet.
- Washing: Rinse the asparagus thoroughly under cold running water to remove any grit or sand that might be hiding in the tips. Pat the spears completely dry with a clean kitchen towel or paper towels. If the asparagus is wet when it goes into the oven, it will steam rather than roast, preventing it from developing a good flavor and causing the cheese to become watery.
- Trimming the Woody Ends: The bottom few inches of an asparagus stalk are notoriously tough and fibrous. They are unpleasant to eat and must be removed. There are two common ways to do this:
- The Snap Method: This is the traditional, foolproof method. Take a spear of asparagus, hold it near the base and roughly in the middle, and gently bend it. The spear will naturally snap exactly where the tender part ends and the woody part begins. You can do this for each spear, or use one snapped spear as a guide to cut the rest of the bunch with a knife.
- The Cut Method: Line the asparagus up on a cutting board and slice off the bottom 1.5 to 2 inches of the stems. If you have particularly thick asparagus, you might also consider lightly peeling the bottom two inches of the remaining stalk with a vegetable peeler to ensure it is tender.
The Magic Formula: Flavoring and Roasting
Before we add the cheese, we need to ensure the asparagus itself is perfectly seasoned and roasted.
Seasoning the Base
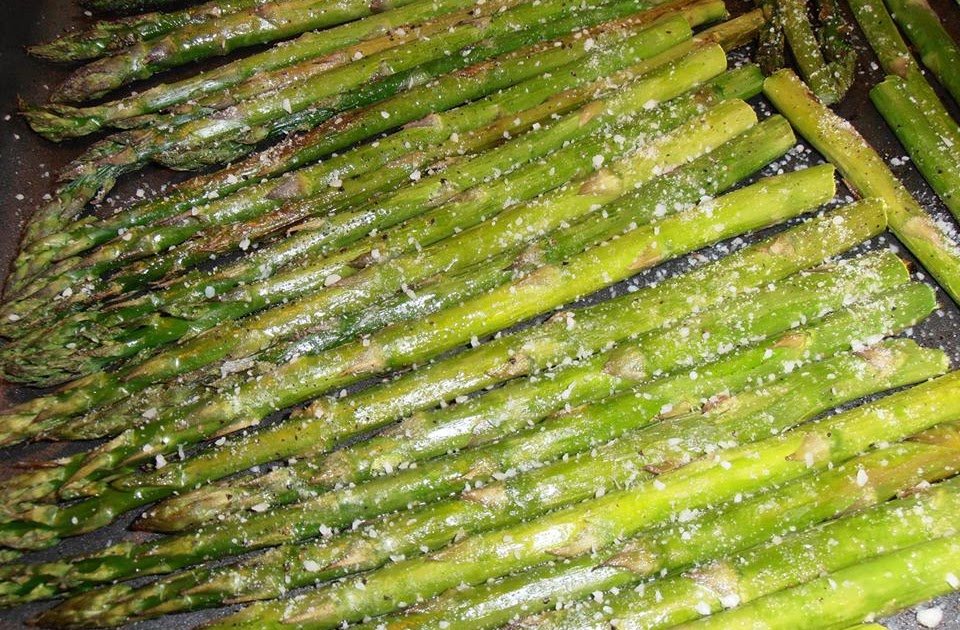
Place your trimmed and dried asparagus on a large baking sheet lined with parchment paper or aluminum foil (for easy cleanup). Drizzle the spears generously with a high-quality extra virgin olive oil. Toss the asparagus directly on the pan using your hands or tongs to ensure every spear is evenly coated with the oil.
Next, it’s time for seasoning. Keep it simple to let the asparagus and cheese shine:
* Salt and Pepper: A generous pinch of kosher salt and freshly cracked black pepper are essential.
* Garlic: Garlic and asparagus are a match made in heaven. You can toss the spears with a teaspoon of garlic powder, or, for a more intense flavor, mince 2-3 cloves of fresh garlic and mix them in.
* Red Pepper Flakes (Optional): If you like a little heat to cut through the richness of the cheese, a pinch of crushed red pepper flakes is a fantastic addition.
Arrange the seasoned asparagus in a single layer on the baking sheet. Avoid overcrowding the pan; if the spears are piled on top of each other, they will steam instead of roasting.
The Initial Roast
While it’s tempting to add the cheese right away, it’s crucial to give the asparagus a head start in the oven. Asparagus needs time to become tender and develop those delicious caramelized, roasted flavors. If you add the cheese immediately, it will likely burn before the asparagus is fully cooked.
Preheat your oven to 400°F (200°C). Place the seasoned asparagus in the oven and roast for about 8-12 minutes, depending on the thickness of your spears. You want them to be mostly tender but still have a slight bite (al dente). They will continue to cook slightly when you return them to the oven with the cheese.
The Crowning Glory: The Cheese Blend
Now for the best part—the cheese! While you can certainly use just one type of cheese, a blend of different cheeses provides a more complex flavor profile and superior texture.
Choosing the Right Cheeses
A great cheesy baked asparagus relies on a balance of melting cheeses and flavor-forward cheeses.
- The Melters (The Base): You need a cheese that melts beautifully to create that gooey, stretchy blanket.
- Mozzarella: Low-moisture, part-skim mozzarella is the classic choice. It melts flawlessly and has a mild flavor that won’t overpower the asparagus.
- Provolone: A great alternative to mozzarella, offering a slightly sharper, more robust flavor while still melting exceptionally well.
- Gruyère: If you want to elevate the dish to gourmet status, Gruyère is the answer. It melts beautifully and boasts a nutty, earthy flavor that pairs perfectly with asparagus.
- The Flavor Enhancers: These cheeses add sharp, salty, umami notes.
- Parmesan (Parmigiano-Reggiano): A must-have. Freshly grated Parmesan adds a salty, savory kick and helps create a beautiful golden-brown crust.
- Pecorino Romano: Similar to Parmesan but sharper and saltier (made from sheep’s milk). Use sparingly!
Pro-Tip: Always buy block cheese and grate it yourself. Pre-shredded bagged cheeses are coated with anti-caking agents (like cellulose) that prevent them from melting smoothly and can result in a grainy texture.
The Ultimate Cheese Blend
For a foolproof, incredibly delicious topping, try this blend:
* 1 cup freshly grated Mozzarella (or Gruyère)
* 1/2 cup freshly grated Parmesan cheese
Baking to Perfection
Once the asparagus has finished its initial roast, remove the pan from the oven. Carefully push the asparagus spears closer together so they form a tight raft; this prevents the cheese from just melting onto the bare pan.
Sprinkle your chosen cheese blend generously and evenly over the top of the asparagus raft.
Return the pan to the 400°F oven and bake for an additional 4 to 6 minutes. You are looking for the cheese to be completely melted and bubbling.
For that irresistible, blistered, golden-brown crust, turn your oven to the “Broil” setting for the last 1-2 minutes. Watch it closely! Cheese can go from perfectly golden to burnt in a matter of seconds under the broiler.
Finishing Touches and Serving
Once you pull the bubbling, golden masterpiece out of the oven, it’s almost ready to serve. But a few final touches can take it over the top.
- Lemon: The richness of the cheese desperately needs a little acidity for balance. A squeeze of fresh lemon juice over the top immediately after it comes out of the oven brightens the entire dish and highlights the fresh flavor of the asparagus.
- Balsamic Glaze: A drizzle of sweet and tangy balsamic reduction pairs beautifully with both the roasted vegetable and the savory cheese.
- Fresh Herbs: A scattering of fresh chopped parsley or basil adds a pop of color and freshness.
- Crispy Bacon or Pancetta: If you want to add a smoky, salty crunch, sprinkle some cooked and crumbled bacon or pancetta over the top before serving.
Serve the cheesy baked asparagus immediately while it is hot and the cheese is stretchy. It makes a phenomenal side dish for roasted chicken, grilled steak, baked salmon, or even alongside a simple pasta dish.
Storage and Reheating
While cheesy baked asparagus is undeniably best eaten fresh out of the oven, you can store leftovers.
- Storage: Let the asparagus cool completely, then store it in an airtight container in the refrigerator for up to 3 days.
- Reheating: To revive the texture, the oven or toaster oven is your best bet. Preheat the oven to 350°F and heat the asparagus on a baking sheet for 5-8 minutes until warmed through. Microwaving is not recommended, as it will make the asparagus mushy and the cheese rubbery.
Conclusion
Cheesy baked asparagus is a testament to the power of simple, high-quality ingredients. By mastering the basic techniques of trimming, roasting, and selecting the right blend of cheeses, you can transform a humble vegetable into an indulgent, unforgettable side dish. Whether you are cooking for a holiday crowd or just treating yourself on a Tuesday night, this recipe is guaranteed to become a regular feature in your culinary repertoire.