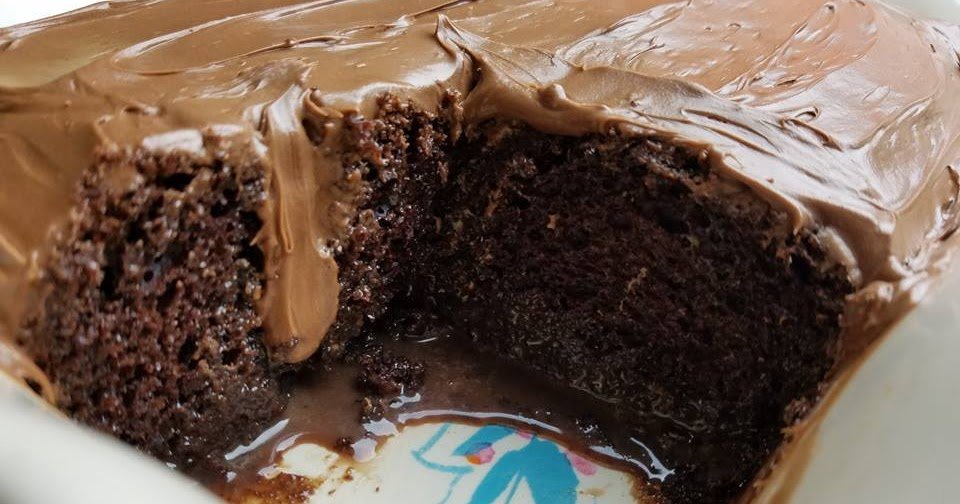
The Ultimate Moist Chocolate Cake: A Baker’s Definitive Guide
A truly great chocolate cake is a thing of beauty. It should be deeply chocolatey, incredibly tender, and above all, spectacularly moist. Yet, how many times have we been disappointed by a cake that looks decadent on the outside but turns out to be dry, crumbly, and lacking in real chocolate flavor on the inside?
The quest for the perfect moist chocolate cake is a noble pursuit, and the good news is that achieving it is entirely possible in your own home kitchen. It doesn’t require complex techniques or obscure ingredients. Instead, it relies on understanding the science of baking, selecting the right ingredients, and executing a few simple steps with precision. In this comprehensive guide, we will unlock the secrets to baking the ultimate, perfectly moist chocolate cake every single time.
The Science of Moisture in Chocolate Cake
Before we dive into the recipe, it’s important to understand what makes a chocolate cake moist. Chocolate cake batter is unique because cocoa powder acts differently than flour. Cocoa powder absorbs a significant amount of liquid, much more than all-purpose flour does. If a recipe doesn’t compensate for this absorption, the resulting cake will inevitably be dry.
Achieving moisture is a balancing act of several key elements:
- Fat: Fat coats the flour proteins, preventing them from forming too much gluten (which makes cakes tough). While butter provides great flavor, oil (like vegetable or canola oil) is the true secret to a moist chocolate cake. Oil remains liquid at room temperature, whereas butter solidifies. A cake made with oil will feel moister on the palate and stay softer longer.
- Liquid: Aside from fat, you need significant hydration. Water, milk, or buttermilk are standard. But the absolute best liquid for chocolate cake is hot coffee.
- Sugar: Sugar is hygroscopic, meaning it attracts and holds onto water. A sufficient amount of sugar is necessary not just for sweetness, but to retain moisture during and after baking.
- Acid: An acidic ingredient (like buttermilk or the natural acidity in natural cocoa powder) reacts with baking soda to create lift, resulting in a lighter, more tender crumb.
The Secret Ingredient: Hot Coffee
If there is one non-negotiable secret to this recipe, it is hot coffee.
- Why Coffee? Coffee and chocolate share many of the same flavor compounds. Adding coffee to a chocolate dessert doesn’t make it taste like a mocha; rather, it amplifies, deepens, and intensifies the chocolate flavor, making it taste richer and more complex.
- Why Hot? Using boiling hot liquid (whether it’s coffee or just hot water) does two crucial things. First, it helps to “bloom” the cocoa powder, releasing its maximum flavor potential. Second, pouring hot liquid into the batter at the very end of the mixing process helps to partially cook the flour and dissolve the sugar, resulting in an incredibly smooth batter and a very tender, velvety crumb.
The Essential Ingredients
To build this masterpiece, you’ll need the following components:
The Dry Ingredients
- All-Purpose Flour: Provides the necessary structure. Do not use cake flour; it doesn’t have enough protein to support the heavy batter.
- Granulated Sugar: For sweetness and moisture retention.
- Cocoa Powder: Use high-quality, unsweetened natural cocoa powder (like Hershey’s or Ghirardelli) or Dutch-processed cocoa. Natural cocoa is slightly acidic and reacts well with baking soda.
- Baking Soda & Baking Powder: We use both to ensure maximum lift in this heavy, wet batter.
- Salt: Essential for balancing the sweetness and enhancing the chocolate flavor.
The Wet Ingredients
- Eggs: Provide structure and binding. Use large eggs at room temperature.
- Buttermilk: The acidity tenderizes the crumb and reacts with the baking soda. If you don’t have buttermilk, make a substitute by adding 1 tablespoon of white vinegar or lemon juice to 1 cup of regular milk and letting it sit for 5 minutes.
- Vegetable Oil: The key to long-lasting moisture. Canola or light olive oil also works.
- Vanilla Extract: Rounds out the flavor profile.
- Hot Coffee: The magic ingredient. You can use strongly brewed hot coffee, or mix 1 teaspoon of instant espresso powder into a cup of boiling water.
Step-by-Step Instructions: Mixing and Baking
This is a very simple “dump and stir” method. You don’t even need a stand mixer!
Step 1: Preparation
Preheat your oven to 350°F (175°C).
Prepare your cake pans. This recipe makes enough batter for two 8-inch or 9-inch round cake pans, or one 9×13 inch rectangular pan.
Crucial step: Do not just grease the pans. Grease them, line the bottoms with a circle of parchment paper, grease the parchment paper, and lightly dust the insides with cocoa powder (not flour, which leaves white streaks on a dark cake). This batter is very thin and sticky, and parchment paper is your only guarantee it won’t stick to the bottom.
Step 2: Whisk the Dry Ingredients
In a large mixing bowl, whisk together the flour, sugar, cocoa powder, baking soda, baking powder, and salt. Ensure there are no lumps of cocoa powder remaining.
Step 3: Combine the Wet Ingredients
In a separate medium bowl, whisk together the eggs, buttermilk, oil, and vanilla extract until well combined and smooth.
Step 4: Mix Wet and Dry
Pour the wet ingredient mixture into the large bowl with the dry ingredients. Using a whisk or a wooden spoon, mix them together until they are just combined. The batter will be very thick at this stage.
Step 5: Add the Hot Coffee
Carefully pour the hot coffee into the batter. Whisk gently to combine.
Warning: The batter will suddenly become extremely thin and watery. This is exactly how it should look! Do not add more flour. The thin consistency is what creates the incredibly moist crumb.
Step 6: Bake
Divide the thin batter evenly between your prepared cake pans.
Bake in the preheated oven for 30 to 35 minutes (if using 8-inch pans). To test for doneness, insert a toothpick into the center of the cake. It should come out clean or with a few moist crumbs attached. Be careful not to overbake, as this is the quickest way to ruin a moist cake.
Step 7: Cooling
Remove the pans from the oven and let the cakes cool in the pans on a wire rack for exactly 10 minutes. This allows the delicate structure to set slightly.
After 10 minutes, carefully invert the cakes out of the pans onto the wire cooling racks. Peel off the parchment paper. Let the cakes cool completely to room temperature before frosting. If you try to frost a warm cake, the frosting will melt and slide right off.
The Perfect Pairing: Chocolate Buttercream Frosting
A cake this good deserves an equally spectacular frosting. While it pairs well with cream cheese frosting or peanut butter buttercream, a classic, whipped chocolate buttercream is the ultimate pairing.
Quick Chocolate Buttercream Recipe:
* 1 cup (2 sticks) unsalted butter, softened to room temperature
* 3 cups powdered sugar, sifted
* 3/4 cup unsweetened cocoa powder, sifted
* 1 teaspoon vanilla extract
* 3-4 tablespoons heavy cream or milk
- In a stand mixer or with a hand mixer, beat the softened butter on medium speed for 2-3 minutes until pale and creamy.
- Add the sifted powdered sugar and cocoa powder. Mix on low speed until incorporated (so it doesn’t fly everywhere), then increase speed to medium and beat for 2 minutes.
- Add the vanilla extract and 3 tablespoons of cream. Beat on high speed for another 2-3 minutes until the frosting is light, fluffy, and spreadable. Add more cream if it’s too thick.
Storage and Make-Ahead Tips
One of the best things about an oil-based chocolate cake is its shelf life.
- Room Temperature: The frosted cake can be stored in an airtight container at room temperature for up to 3 days. It will remain perfectly moist.
- Refrigerator: You can refrigerate the cake for up to 5 days, but be aware that the cold environment will harden the butter in the frosting and slightly firm up the cake crumb. Always bring the cake back to room temperature before serving for the best texture.
- Freezing: This cake freezes beautifully. You can freeze the unfrosted cake layers by wrapping them tightly in plastic wrap and then aluminum foil. They will keep for up to 3 months. Thaw them overnight in the refrigerator before frosting.
Conclusion
Baking the ultimate moist chocolate cake is not a mystery; it’s a matter of technique and trusting the process. By relying on oil for lasting moisture, utilizing buttermilk for tenderness, and incorporating hot coffee to bloom the cocoa and smooth the batter, you are guaranteed a professional-quality result. This recipe yields a cake that is dark, decadent, and so incredibly moist that you’ll never need to search for another chocolate cake recipe again. Prepare to become the designated cake-baker for all future celebrations!